
Electro Harmonix East River Drive Overdrive
All overdrives are not created equal
Sometimes the “hype” or just the brand name is enough to generate interest in a new product especially in the world of guitar effects. Such is the case with the Electro-Harmonix East River Drive Overdrive (advertised as a Tube Screamer clone more or less). The description sounded good, and the reviews, while limited, were pretty good, so I pulled the trigger on one ($58.99). Bad decision. I have never been so disappointed in a new stomp box and especially one from E-H. To be fair there was 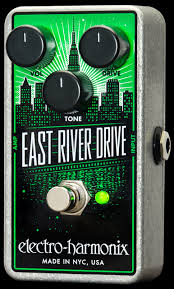 only one aspect of the thing that turned me off. Unfortunately it’s the first thing you notice when you kick it in gear even before the tonal characteristics. The volume drop. It’s pretty severe. I tried cranking it up and barely got past unity even at full volume. I’ve never had an overdrive that didn’t boost the volume with headroom to spare, although some had MORE on tap than others. The point is a drive with no volume boost is of no use to me. E-H has always put out a good product at an affordable price so maybe it was bound to happen that one would fall short of expectations, I don’t know (NOTE*: FWIW it’s also entirely possible that I got a defective unit). But don’t think that I’m writing E-H off. In fact they have another new release that I am going to take a run at later this week, it’s the new “Soul Food” overdrive. Early reviews compare it to a Klon. Stay tuned for a review on that one.

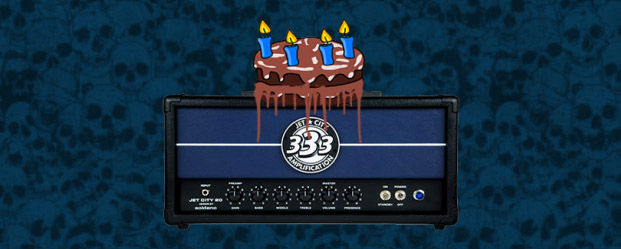
My Jet City JCA20H – 4 Years of Tone Soaked Bliss
My little tone monster’s 4th birthday!
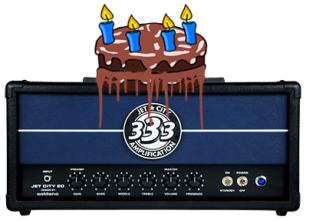 It was 4 years ago today that I hauled ass to G.C. here in Phoenix to grab a Jet City JCA20H. I say “hauled ass” because I had been watchinig the news feeds for an indication that Jet City had shipped their first amplifiers. It was 3 or 4 months previous that I found out about this new company that boasted Michael Soldano as one third owner and that he designed the flagship model JCA20H. With promises of “100{c30863b33595577c5ed4837af2f5c015c450d3942ad00dad7003b8bc2d2ae483} Tube Tone and 0{c30863b33595577c5ed4837af2f5c015c450d3942ad00dad7003b8bc2d2ae483} Bullshit” at affordable prices they had my undivided attention! Then I got wind that they had shipped the first units. I called G.C. and found out that they only had one left, which explains the “hauled ass” statement. I also grabbed a couple of the JCA12S cabs to complete the package. Just for reference, over the years I’ve used a bunch of different amps (all tube of course). From MusicMan, Kustom, and Peavey, to Fender, Marshall, Mesa, and Ampeg. All good amps for sure. I never had one that I would call bad, they’re just all different. Like most of you I’ve been on a quest for that elusive “tone” the entire time. The Ampeg came the closest, but it was a 300 watt monster SVT with the 8×10 cab (I paid $275 for it in 1975). Not very practical for an apartment dweller. I gotta say even though the sound pressures were freaking brutal (I think the term “ear bleed” was coined for this very amplifier), the “tone” was unreal. Fast forward a couple of years (33 years actually) and I have my little tone monster and I couldn’t be more pleased. It nailed that tone in my head spot on. I bought it without trying it in-store simply because I
  had convinced myself that if Soldano put his name on it then it had to meet a certain level of performance and quality and I love his hand built creations, so with a WTF attitude I bought it and here we are. It’s gone through a few modifications here and there. Started with the cosmetic stuff like the steel baffle, LED accent lights, and burghundy snakeskin Tolex, then the internal stuff like the tone stack mod, a depth mod and a choke. It goes without saying that I went through some tubes to really dial in the tone like we all do when we get a new amp. So after 4 years what’s my opinion of this little beast? Put it this way: I never hung on to ANY amp for more than a year, maybe year and a half because I had to keep looking for “the right one”. 4 years on and it’s still with me. On a scale of 1 to 10 the Jet City JCA20H scores the coveted “11” in my book. And just like everything else “tone” related, YMMV.


Easy Loose Vacuum Tube Repair
Quick fix for a sloppy vacuum tube socket
Vacuum tube sockets are generally pretty sturdy, unless you change tubes frequently. And let’s face it: when the quest for tone bug has it’s teeth in you, the odds are you are going to try different tubes and/or tube combinations. Nothing wrong with that as it’s a time honored tradition among guitarists. What it leads to, unfortunately, is the occasional loose tube. This can be frustrating when they break contact intermittently. Each pin on the tube slides into its own little hole in the socket and inside that little hole is a split metal contact that grips the pin by tension from that contact.
Over time, even if you don’t change tubes alot, those contacts get spread apart to the point they no longer grip the pin and that’s where the trouble starts. But I have a super simple method for restoring that gripping action with a quickness. 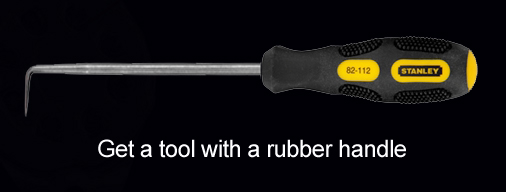
All you need is a tool like in this picture. This paticular tool came in a set that has a straight tip, a hooked tip, a 45 degree tip, and the one I use for this repair, a 90 degree tip. You can actually make one but it’s going to need a handle for gripping and twisting as you will see.
(WARNING: (you’ve no doubt heard this before but for both our sakes here it comes again) tube amps contain lethal voltages that can kill you. And I mean tag-on-the-toe dead! Always drain the capacitors of these voltages before venturing in, and keep one hand behind your back while working in there. If you are uncomfortable working around these hazards, don’t. If you just plain have no idea what you are doing, you need to learn first. There’s a ton of info on this subject all over the net.
This is for a head. If you have a combo you will need to transpose for that type amp.
The process is simple and there are two methods.
Method #1 (for amps that have bleeder resistors to drain the capacitors):
Turn off the amp and unplug the power a few hours berfore attempting this repair.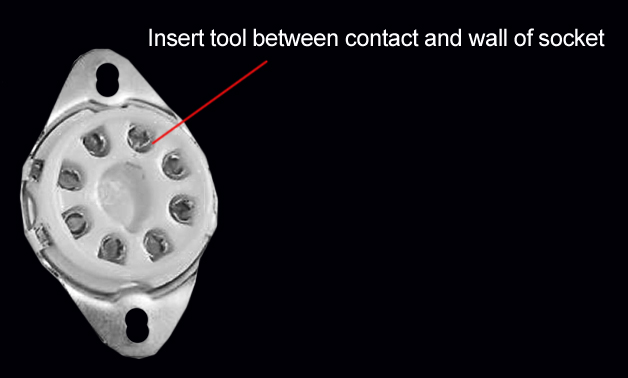
1. Remiove the front baffle form your amp
2. Remove the tube(s) that is loose
3. Starting with Pin #1, insert the tool into the pin hole to the outside of the metal contact
4. Gently twist the tool towards the center of the pin hole.
5. Now insert the tool on the other side of the same contact and twist towards the center again.
6. Repeat for each pin hole then go on and do the rest.
7. Repeat the process for any other sockets that were sloppy.
You don’t have to Jethro the thing, be gentle cause those contacts bend super easy and overdoing it could deform them or even break them and you don’t want to have to replace the whole freakin’ socket.
Method #2 (amps without bleeder resistors)
1. Pull the chasis and drain the caps (see warning above)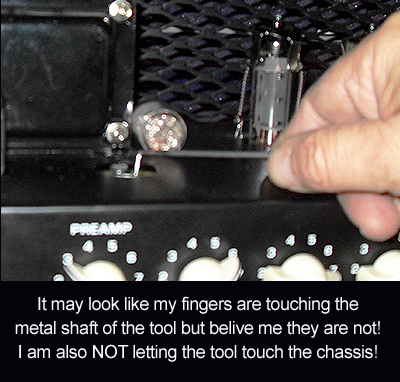
2. Perform steps 2 thru 7 of Method#1.
That’s it except you should get some electronics parts cleaner and clean the pins on the tubes while your in there. They get oxidized so it helps a lot with contact.
Replace your tubes and button up the amp, fire it up and rock out!

MXR Custom Badass Modified O.D. Pedal
MXR Custom Badass Modified O.D. WTF? Another Overdrive?
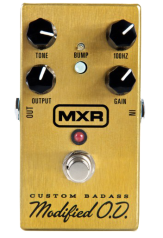
Ok, now that I’ve had the Badass Modified O.D. for a few days I can make a reasonable assesment on it. First thing is that it absolutely does what the mfgr. says it does. The range of tones is huge, thanks in part to the 100HZ knob and the “bump” switch. Note separation is good any settings and the tone knob is useful throughout its sweep (it doesn’t cut lows like some pedals). The only wrinkle is how it acts with other dirt pedals. It doesn’t sound too good with the Barber Burn Unit or the Akai Blues Overdrive at all. It likes the Open Road pretty well, but it LOVES the Voodoo Lab Sparkle Drive. With the MXR in front of the VLSD it sounds incredible. And I have to credit the VLSD “clean” knob for that. Here are the settings that I have found to worked for me. I am including them to give you a starting point. (YMMV):
Badass O.D.
Output: 11 o’clock
Tone: 3 o’clock
100HZ: 2 o’clock
Gain: 1 o’clock
Voodoo Lab SD
Gain: 3 o’clock
Tone: Cranked
Clean: 11 o’clock
Vol: 1 o’clock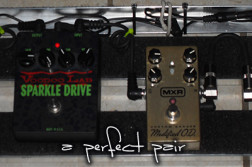
And just like everything else tone related, this is all subjective since what sounds sweet to my ears may be fingernails on a blackboard to someone else. But I can’t help but think that this would be a welcome additon to any pedalboard.

Jet City JCA20H Front Baffle MOD
Jet City JCA20H Baffle MOD using expanded metal.
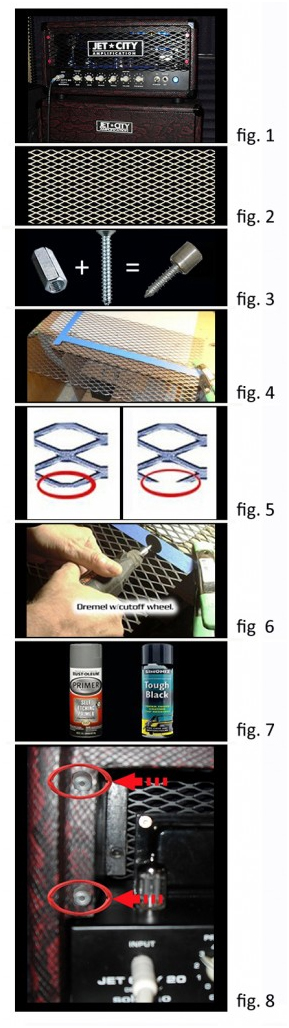
I bought my Jet City JCA20H the week they hit the stores, and I bought it without test driving it. I never considered it since the thing was designed by Soldano, plus everything I had read leading up to the first shipment going out was all good. I was not wrong. This is one of the ballsiest straight up rock & roll amps I’ve ever plugged into. After dialing it in with a tube upgrade and a minor internal mod I decided it needed a facelift. What i came up with was the expanded metal like Soldano uses on his mega-buck models. And it should work for most tube amps with some minor adjustments. It definitely gives the amp a “SOLDANO” vibe (fig. 1) while increasing the airflow to the tubes. So it isn’t strictly cosmetic. And with this type of baffle you can add LED lights to illuminate the tubes and other shit inside. The whole thing costs about $30 but you get enough materials for two baffles. So you can make one for the back side of your amp or make one for a buddy. (click image for larger view) I also put a video up on YouTube a long time ago, but you’ll get more detailed information from this article. If you want to check out my video, here’s a link to it. JCA20H_baffle_MOD
Expanded metal at Home Depot (fig. 2)
What you’ll need to do this mod:
- Expanded or perforated metal at least 6″ x 20″
- 1/2″ coupling nuts with 6-32 internal threads. (4)
- 1″ course thread screws (drywall screws work pretty good for this) (4)
- Computer case thumb screws (4)
- Dremel with reinforced cut-off wheel (good tin snips will work if you don’t have a Dremel)
- Medium to fine metal file (1 or 2 of each)
- 100 grit and 400 grit sand paper
- Masking tape (painters tape if possible so it doesn’t leave any residue)
- Lacquer thinner (or some kind of solvent. Alcohol works in a pinch)
- Self-etching automotive primer
- Black spray paint. Flat doesn’t look to good but semi-gloss or high-gloss will work just fine.
Start by removing the factory front baffle by accessing the screws from the rear of the amp. Check the opening for size. For the JCA20H it will be 17 7/8″ x 5″. The 5″ height measurement puts the lower edge of the new baffle even with the top edge of the chassis. I added 3/8″ to mine so it would extend just a bit lower than the chassis. And If you want to roll the edges inward you need to add a little all the way around to compensate.
Clean the new metal with solvent to remove the coating of oil. Then figure your cut lines and tape them off (fig. 4). The tape will act as a guide for cutting. Clamp it down tight to a solid surface and cut along the tape with the Dremel (or tin snips). (fig. 6)
NOTE: Watch out that you don’t mark it to cut in such a way that it will leave razor sharp points along the upper or lower edge. They not only look bad, but they’re freakin’ dangerous too! (fig. 5)
Once that’s done take a file and clear any burrs or sharp pieces of metal from the edges. Then sand both sides with 100 grit paper followed with 200 or 400.
Primer both sides and let it dry. Then apply the color coat. Several light coats with adequate drying time between coats will give better results.
Next, cut the heads off the 1″ screws (fig. 3) and force thread them into the coupling nuts. You may need to hit the screws with a file just a little to make this easier.
Hold the new baffle against the face of the amp and mark 4 mounting locations with a scratch awl of a Sharpie marker. Drill a hole at each mounting point and screw the coupling nuts down tight. (fig. 8)
Hold the new baffle against the coupling nuts and fasten it in place with the knurled thumb screws.
That’s it. All that’s left is to reattach your Jet City badge and you are ready to rock.
In my next post I’ll show you how to install LED lights. And I’ll show you how to power the LEDs internally from the amp, including an on-off switch so you don’t have to use an external power adapter.
Heres a short video

Gibson Les Paul Brass Bridge and Tailpiece Replacement
Solid Brass Bridge and Tailpiece
An investment in Tone!
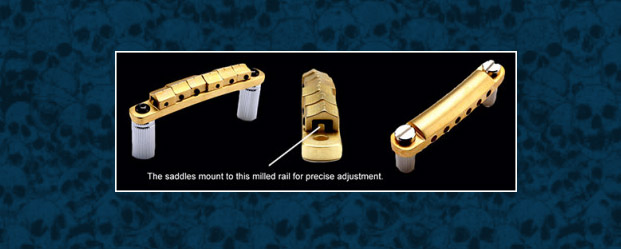
 This is not meant as a tutorial OR “how to” on Les Paul Bridge Replacement, lots of those on the net. This article is more about the sonic benefits of replacing the factory setup with something better. After dealing with some minor issues with the factory hardware, and countless searches on the net, I opted to install the solid milled brass bridge and tailpiece from Guitar Fetish. There are several unique features that made this set up worth checking out. To begin with, each piece is milled from a solid block of brass. The saddles on the bridge are mounted on a solid rail by set screws front and back on each saddle and are designed for precise intonation adjustment. It’s milled with a slight arch to match the radius of the fretboard. This unit also uses a direct solid mounting system which bolts it directly to the body which equates to a huge increase in sustain.
The stopbar tailpiece is also quite unique in several ways. First it also bolts directly to the body, no floating mount. But the most unique feature is the slight bow making the A-D-G- and B stings just a fraction longer with the high and low E strings anchored at normal length. I don’t quite understand the theory behind this, but it definitely makes chords resonate more and I believe it makes intonation more accurate as well. A major side benefit is that it eliminated having to raise the stopbar tailpiece high enough to keep the strings from contacting the back side of the bridge, which caused all kinds of issues especially with sustain. When you break it all down, the overall design is kind-of a no-brainer. As few moving parts as possible, mill the whole thing from solid brass and bolt everything tight to the body. It just works
 I run my Gibson Les Paul Studio through a Jet City JCA20H with just a Voodoo Labs Sparkle Drive, an MXR Custom Badass Modified O.D. and a Biyang Tri-Reverb and I can pull any sound I could ever want out of her. Like I said, I had issues with raising the tailpiece but this mod corrected the problem and the sustain is off the hook!
Since I have had this modification on the guitar for well over a year now I suppose I can make an honest assessment, and the best way I know to do that is to say this: If I went out and dropped $7000 on a Gibson Custom Shop reissue of a 59′ Burst today, by tonight my order for another bridge and stop tailpiece set would already be confirmed. That’s how much of an improvement this unit makes. The guys at Guitar Fetish really knocked one out of the park with this one.


Akai Blues Overdrive Pedal
Decent Blues Overdrive
 Sometimes things happen that make you scratch your head and say “WTF?”. And that is exactly what happened to me a few days ago. I had been trolling Craigslist for a few weeks looking for an interesting pedal just to mess around with and I found something: an Akai Blues Overdrive that the owner was willing to trade for a good chorus pedal. I just happened to have a Marshall Supervibe that I hadn’t used in a while so I emailed him and voila, the deed was done!
Now let me explain about the Akai: I had done a bit of research on that pedal a while back and wasn’t too impressed with the audio clips. And I also found out that it was actually a rebranded Biyang pedal. They sold for more than double what the Biyang units went for, so I didn’t really give it another thought. But this was a pedal just to goof around with and try some different mods and just generally experiment with and if it got trashed no biggie. Long story short, I got it home and plugged it in and Holy Shit! this freaking thing sounds great! When run with my Burn Unit the combination flat out smokes! With a few twists of a knob it goes deep into metal territory. That fact really doesn’t mean much to me since i don’t play metal, but it illustrates how extreme these two pedals can get when run together. By itself, the Barber Burn Unit beats it on every front. But that’s not to say the Akai doesn’t sound great in it’s own rite. In fact, it sounds like the Voodoo Lab Overdrive with just a touch more high end response. It’s very smooth through most of the drive knobs rotation until about 2 o’clock, at which point it gets grittier and crunchier but not in an over the top kind of way. NONE of those youtube videos does this thing justice. And if it hadn’t been for the situation at the time I would never have even thought about one of these. Karma, man. Karma led me to it. Has to be, right?
The construction is pretty solid too. I’m not sure if the top half of the case is polished stainless or hard chromed, but I’ve never seen another pedal like it anywhere. I’ve had Harleys with expensive chrome jobs that were no where near this nice! (could be a negative point if stage lights ever hit it at the perfect angle cause the reflection just might flash blind you. I’m not kidding).
But just like everything else we hold dear, the tone is completely subjective to the player. What sounds like a Harley with 2″ straight pipes going flat out on an open road to me might sound like a mo-ped with bad gasoline to you. And I ain’t tellin anybody to run out and buy one of these. But If you ever get the chance to check one out you really should.
The next post will cover my other new pedal: the aforementioned Barber Burn Unit (Karma was smiling on me for that one too). As for the Akai, there will be NO experimenting with this unit, that’s for damn sure.

Original 4 Knob Barber Burn Unit Overdrive
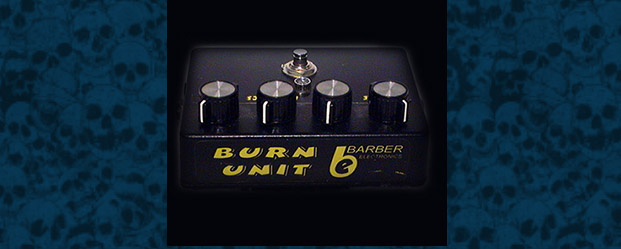
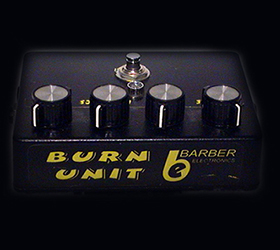
Barber Burn Unit
 Even though I am a creature of habit and hate change of any kind, the quest for gear will always win out. If you read my “Open Road” article a couple of posts back, you probably didn’t expect a new overdrive to enter into my set up I’m sure. But in fact that is what happened. Two pedals to be exact. And both of them are keepers for sure. On a whim I picked up an original 4 knob Barber Burn Unit. And let me tell you , It was a great find. The job of “main overdrive” is now split between the Barber and the Open Road. But the barber does something that the Open Road didn’t do very well: it blends with other overdrives to allow me a wicked range of tones. So the Open Road is used as stand alone, and the barber I can use alone or with other pedals.
The Barber utilizes 4 knobs (volume, tone. dynamics, and burn) And can be dialed in to give you a huge tonal palette, as long as what you’re after is NOT metal. It doesn’t go there nor was it designed to. It’s an overdrive of the highest order, NOT a distortion pedal. However, if you drop another drive pedal in front of it you CAN reach metal territory no problem, as happens with a Modtone Dyna Drive. But I don’t play metal so it’s a moot point anyway.
The volume and tone are pretty straight forward. It has gobs of volume on tap and I doubt I will ever have a need to dime that knob. The tone knob is actually useable on this unit too. The Dynamics knob reacts like a depth knob IMHO and is usable through the entire range. Then there is the “Burn” knob (which is a pretty accurate description). I guess it’s the “gain” knob but it does a lot more especially when you get the right balance in conjunction with the Dynamics knob. This is when the pedal really comes to life. The more you crank it, the sweeter and more defined the tone becomes. There is also an internal trim pot that I have no idea what it does and now I’m afraid to tweak it because it sounds so good as it is, and I don’t want to screw it up.
Construction is typical Barber. Rock solid. You could drive a truck over it and it wouldn’t miss a lick. (It’s like that old joke: If we have a thermonuclear war the only things left will be cock roaches, and Keith Richards. Well, you can add Barber stomp boxes to that list.)
It’s honestly like no other overdrive I’ve ever used. I tried at various locations in front of and behind a Modtone Dyna Drive, Visual Sound Open Road, and my Akai Blues Overdrive (see previous article). The Barber likes to be first in line for sure and it seems to play well with these pedals at least, especially the Akai (go figure) which leads me to conclude that it will play nice with virtually anything. As I said before, this is now my main Overdrive with the Akai right behind it, and it gives me everything I need, and unless I stumble across something really rare or just flat out too cool to pass up, it will be from now on. (I could probably let the Open Road go, but I still love that box too. Besides, no one can make me give it up so I think I’ll just keep it).
(note: I keep putting off buying another SM-57 since my other one walked on me so I can’t mic the cab and record some decent audio clips. But I’m looking now and when I get one I’ll post clips)

Iconic Hummingbird Acoustic on a Budget
Epiphone Hummingbird $299 street
 Over the years I’ve had a number of acoustics. Some good and some not so good (I’m sure most of you have too). But at some point I get that G.A.S. syndrome and usually sell what I have and shop for another one. This last time (due to pay cuts at work) I sold my acoustic because I needed rent money. I had an older Epiphone Hummingbird that was really nice and I got it for cheap from craigslist. But due to the aforementioned pay cuts I couldn’t afford a replacement. Time passed and things have started to look up again somewhat and I decided it’s time to pull the trigger on another acoustic.
My intention was to look for another Hummingbird, but I also wanted to see what else was available in the off-chance I may find something I like better. In a months time I tried lots of low priced designs and they all seem to feel kinda cheap. Not that they were bad players, in fact some were quite good. But there’s something missing from the overall feel of most of the models I tried. Plus none had the tone to compete with the Hummngbird and of course fit and finish is also iffy on a budget acoustic. Having exhausted every good lead on craigslist I finally said ‘screw it” and went to some local music stores to try out the new stuff.
I went through everything and was largely unimpressed with 2 exceptions: as expected the Epiphone Hummingbird Pro and the Dove Pro. I don’t know how long these “pro” models have been out so they’re new to me. Having played the Epi Hummingbird for quite awhile I noticed the difference in quality right off.
First, it’s electric and that’s a welcome addition. It uses an onboard E Performer system which sounds better than average to my ears. But the real clincher is that these seem to have been built to tighter tolerances, although I may have just gotten lucky. But I’ve seen 2 others since I got mine 3 weeks ago and they too had the noticeably better fit and finish.
 Which brings us to the bottom line: what does it sound like. That’s an easy answer, it sounds like a Hummingbird. After my previous Bird I have to agree that the design, construction, and combination of materials is like no other guitar, hence the unique sound. And that’s what I missed after selling my previous one. I had to have that sound again. The most beautiful acoustic ever! And it doesn’t matter if you have a Epi or the Gibson model because they sound so similar. Not identical by any stretch of the imagination, but still there is something familiar about them that’s buried in the tone. I’ve heard people say that they can’t tell the difference in playability but I don’t buy it. I can tell the difference for sure, but that doesn’t mean the Epi is bad, it’s just different, that’s all. For me the cost differential is enough to make the Epiphone worth taking for a test drive. It has the ringing tonal quality that lies within a range that makes it easy to vocalize with but can stand on it’s own without it.
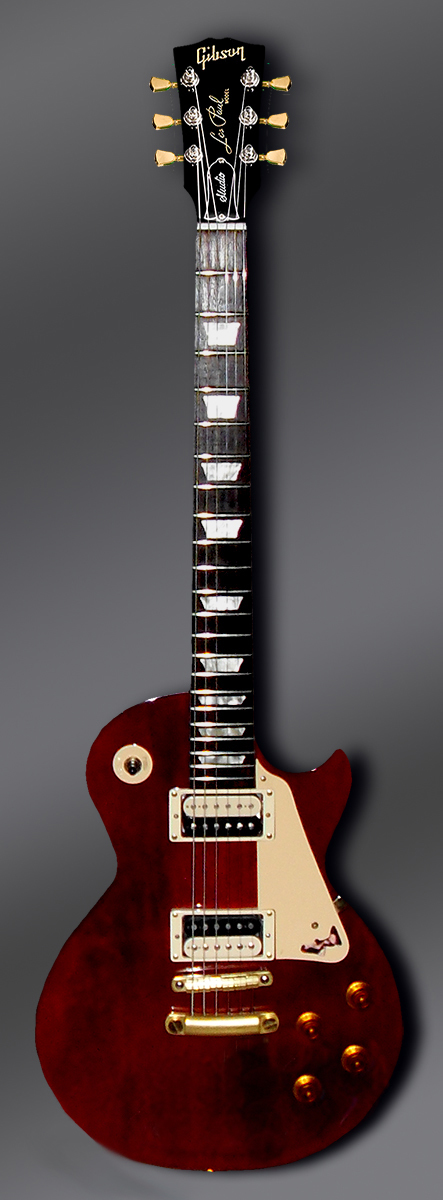
Everyone that hears it comments on the beautiful tone as well as the finish. They have taken a lighter approach to the cherry sunburst by not making it quite so red. It looks awesome. All the other factors are there: a relatively fast, easy playing neck with smooth well fitted frets, the classic Hummingbird pick guard, the split parallelogram position markers, and full binding on the body and neck. They’ve also added genuine Grover tuning machines as standard equipment. The suggested retail is almost 500, but at street you can snag one like I did for $299. It’s a great deal on a great guitar. If you have the extra 2000 to 3000 for the Gibson you could go that route. Hell, to be honest, if I had the bucks to drop on a Gibby I probably would have. And I may still someday. But until that big winning lottery ticket drops in my lap I’ll just enjoy this one because it is, after all, a Hummingbird.
The Preamp Tube Maze
Preamp Tube Maze of Confusion
Preamp tube (12AX7) selection is a subject that will return as many opinions as there are guitar players. It’s the preamp tube maze of information and opinion (or should I say MIS-information) If you research any “preamp tube” (or any other vacuum tube or “valve” for that matter) on the net like I did, your head will be filled with so much conflicting information it just might explode! The thing is, it’s not exactly wrong information, it’s just that the sound generated by tubes is subjective. What sounds good to me might sound like fingernails on a black board to you. That’s a bit of an exaggeration to illustrate my point, but even slight variations in construction or materials will change the tubes character which can, and often will, make or break a valve.
To begin, the first change I made was to dump the cheap power tubes and plug in a matched set of new Mullard EL84s which have always been my favorite. I then re-biased the amp. Then I began my journey through the preamp tube maze.
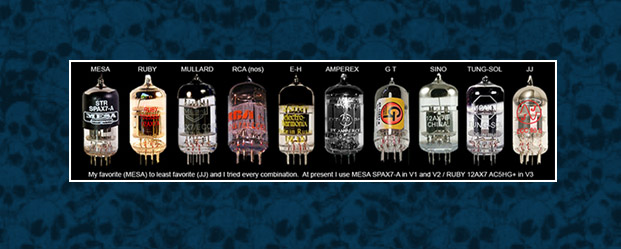
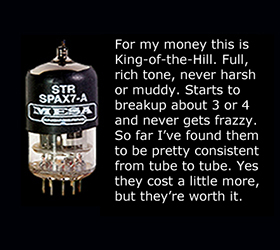
Alot of cats really like the JJ brand. In fact that was the first swap I did to my Jet City JCA20H. I hated them and could not get them out of there fast enough. They were terrible. Flat in the mids and lows and spikey in the highs. Thus my trek began with determination to find the best sounding tubes possible. I ended up with just about every 12AX7 from every manufacturer as well as every 12AX7 variant (including the 7025) over the course of 4 months. I tried matched sets as well as random combinations in order to find what I was looking for. There were several that I liked but only one combination nailed the tone I was chasing: V1=MESA SPAX7-A / V2=MESA SPAX7-A / V3 (or PI)=RUBY 12AX7AC5HG+ (note: the MESA will cost a little more but it’s money well spent in my opinion) And believe me, I spent some money here folks, but in the end it was all worth it. All of the other tubes I found to be either too harsh or muddy or flat sounding so I gave them away to some cats I met over at the Jet City Facebook page who needed replacements but couldn’t go the bucks for a new set at the time. Some of them are still in use because they like them, which only goes to show what we all knew anyway, that tone is totally subjective. In fact I didn’t write this post to push my opinions about tone on anybody. Everyone has that tone in their head that they’re chasing, and what works for me may not work for anybody else. Of course you have to factor in the amp you’re using which creates a pretty big variable even between amps of the same make and model. I wrote this hopefully to entertain and maybe enlighten a little bit. It was a crazy 4 months slogging through the preamp tube maze, and my non-playing friends just didn’t understand and thought I was an idiot for spending so much money on these little glass gems (and they’ll never understand). Even with all the blown money and time spent trying to locate certain tubes and the anticipation when I’d score something different and race home to swap them out then cranking up the amp only to be disappointed with the results and the aggravation of it all, it was worth every bit of it the first time I cranked her up with the right tubes in place. Suddenly all of the negatives just faded into memory and I couldn’t stop grinning like and idiot. I still get that feeling every time I play. Since this adventure I’ve toyed around with various overdrive pedals (a subject for a future post) and vibe pedals, but I can play without any of that shit and just use the tone stack on the amp to get any tone I could ever need. After 30 years I finally found my holy grail. I hope in some way maybe this story will help you find yours too.


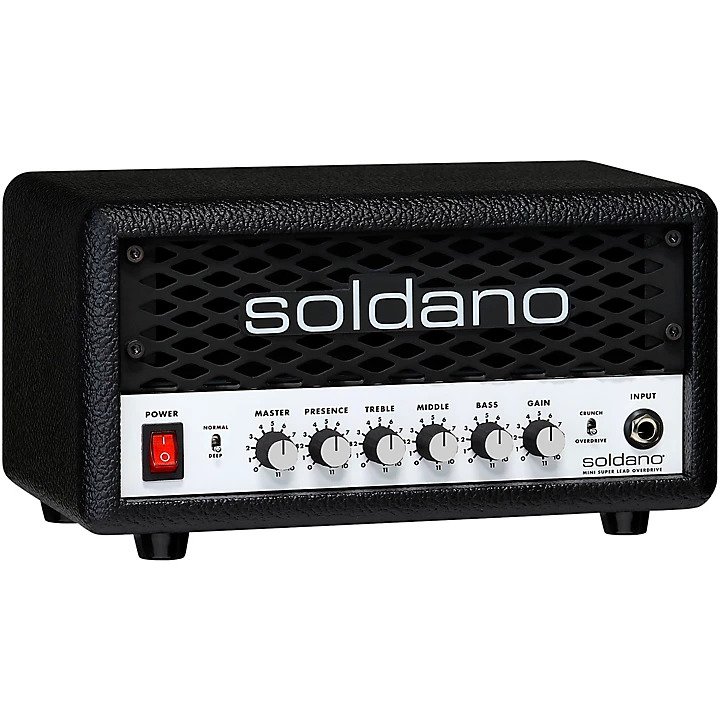 Soldano SLO Mini 30 Watt Killer AmpIn All Posts, Amps, ReviewsI have never gotten excited about ANY solid state amp. […]
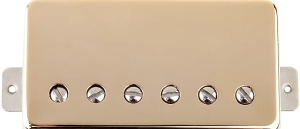 Leslie West Mountain of Tone PickupIn All Posts, Guitars, ReviewsWhen it comes to electric guitars, it’s common […]
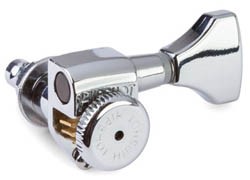 the BEST Guitar Tuners EverIn All Posts, DIY Mods, Repairs, ReviewsOver the past 20 yrs. it’s safe to say […]
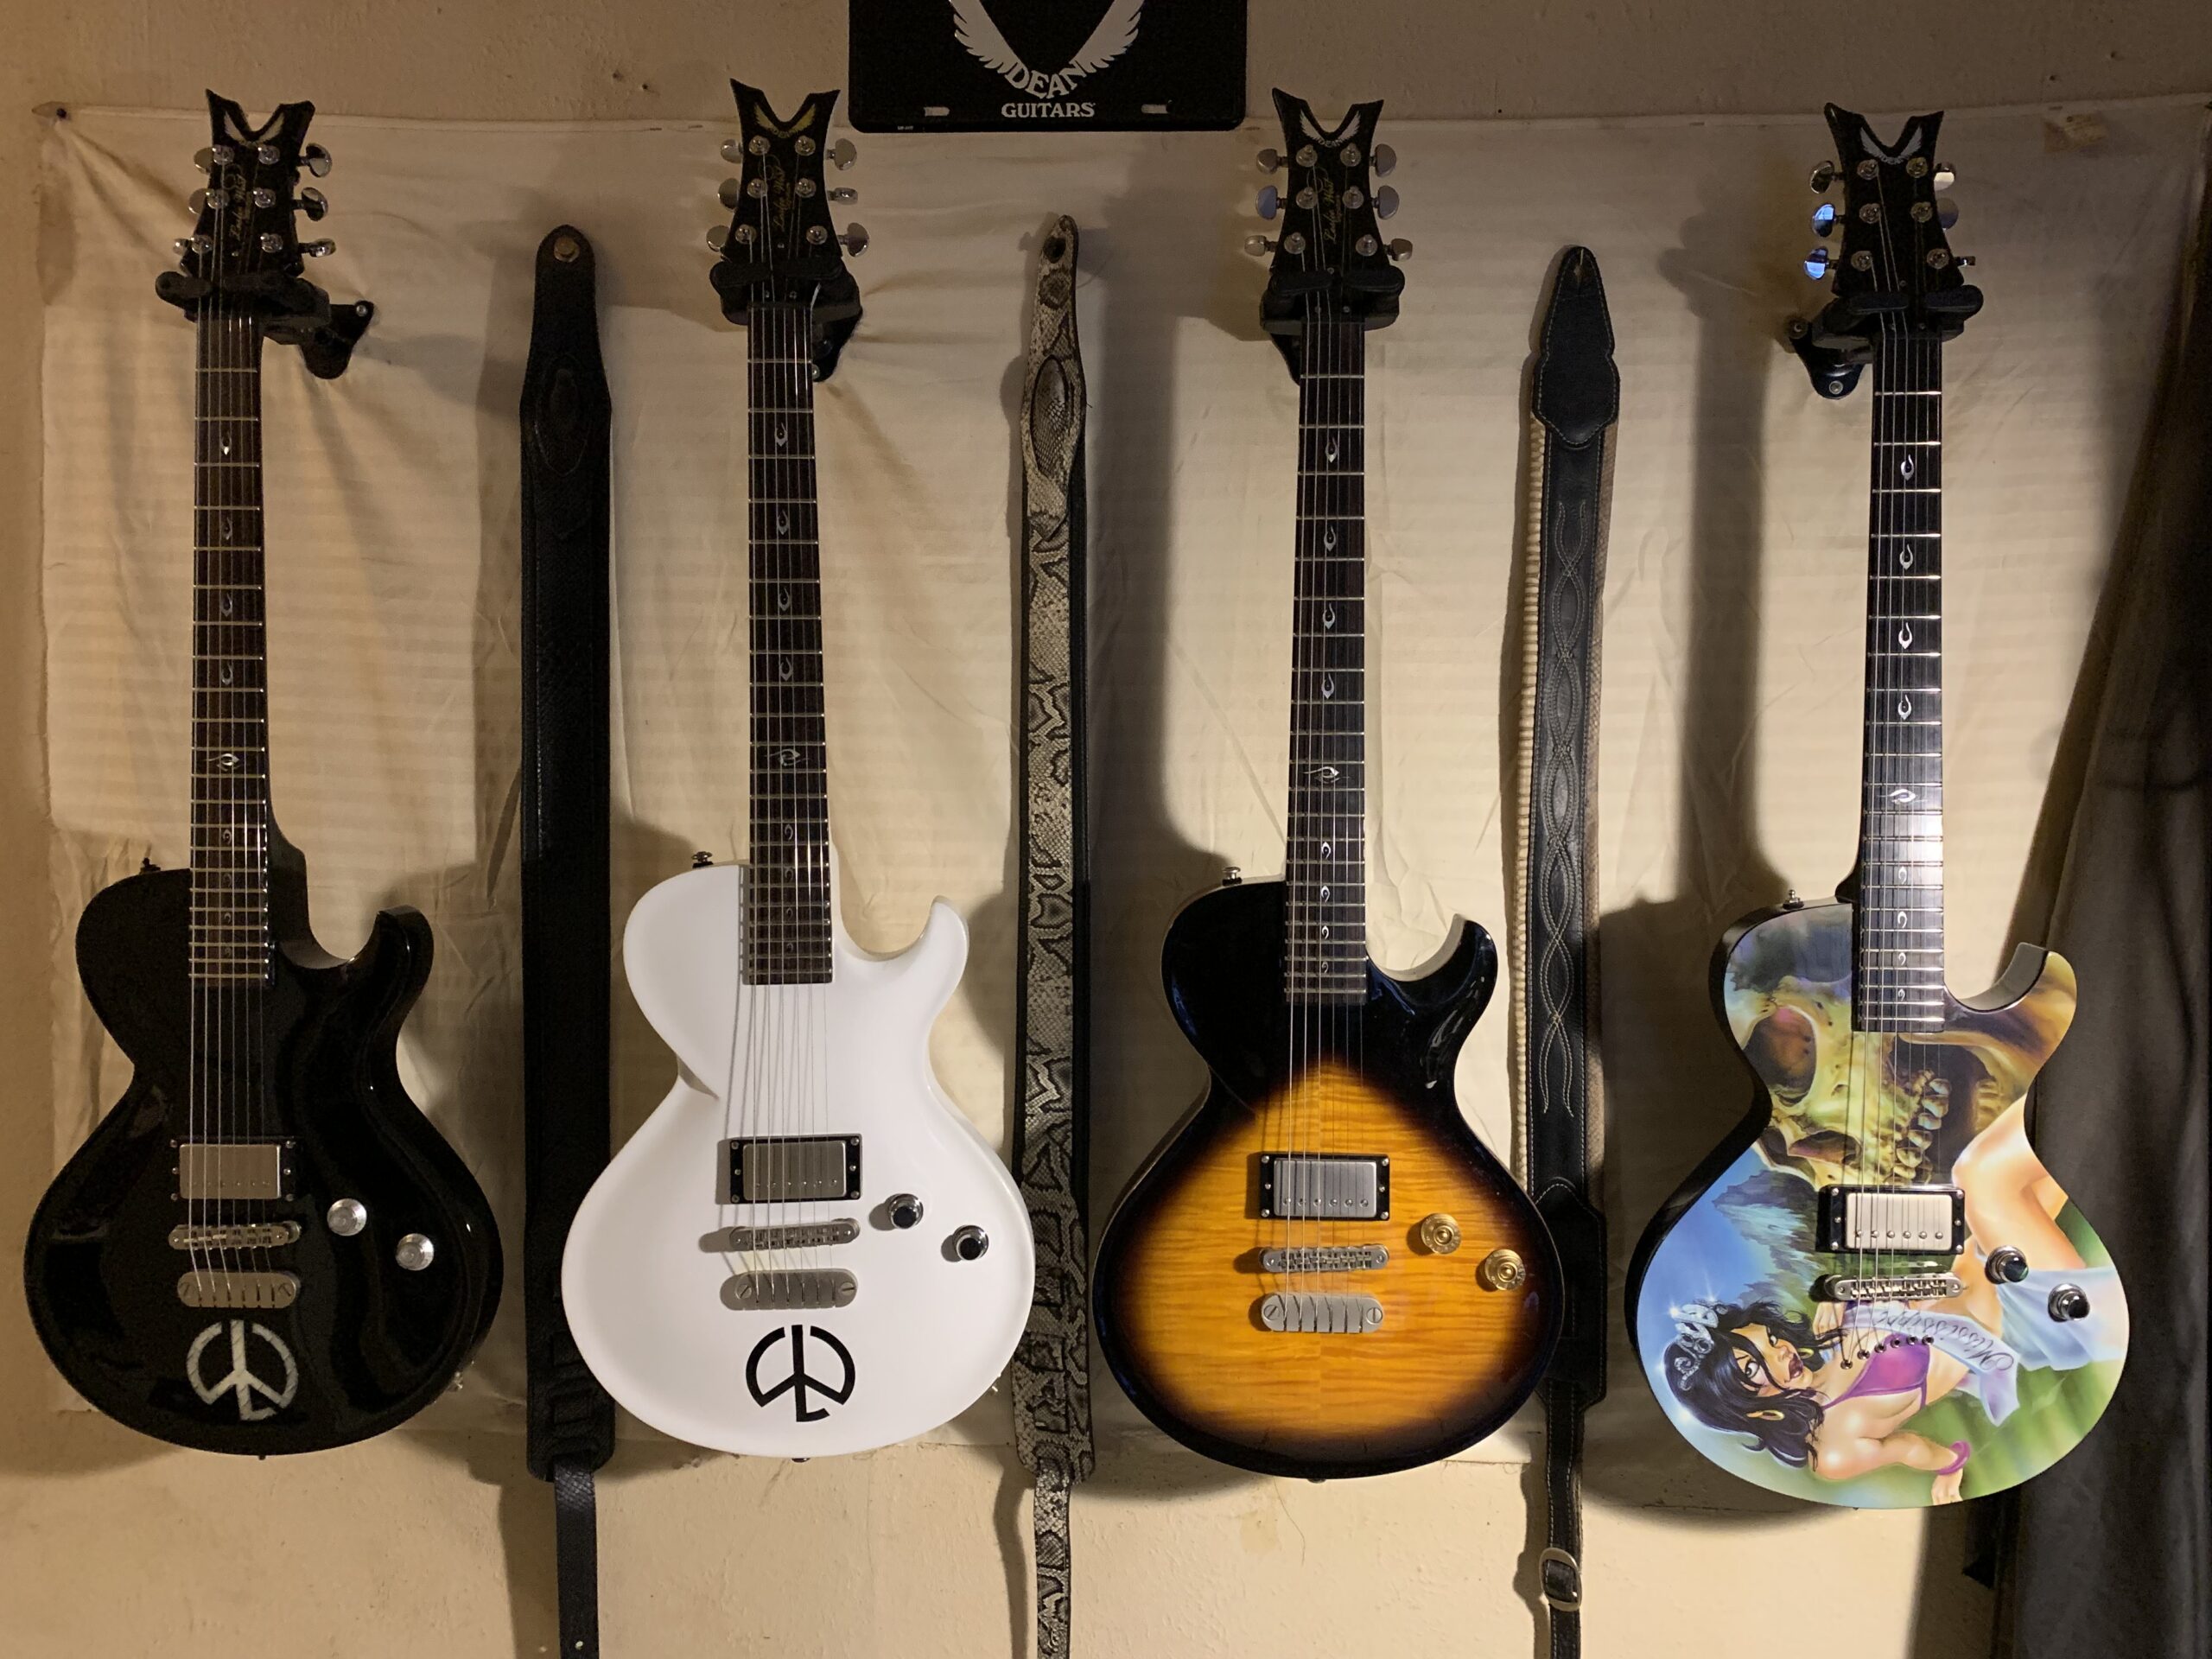 Dean Leslie West Signature ModelIn All Posts, Featured, Guitars, News, ReviewsLeslie West gained fame the world over during his […]
 Tributes to Leslie WestIn All Posts, Featured, NewsI’ve been playing guitar since […]