
Laney Cub 12R Hot Transformer Fix

click for larger view
I had some doubts about this little combo since I discovered the cab is made of compressed cardboard or some shit which was a shocker (read about it here). But I love the tones I’m getting out of it so I’m hanging in to improve the quality as much as I can. So after recovering the cab I added external voltage test points and drilled a hole directly above the bias trim pot so I can bias without pulling the chassis (I use a bias probe to read current). I made a wooden trim pot adjustment tool for it which works perfectly. It was at that time I noticed how hot the thing was getting. I read about the transformer heat issue some dudes  were having but this was worse. The entire chassis was too hot to touch. I now have it running at 298 volts on the plate and biased at 22.3 mA which is pretty moderate so that left just the transformers as the heat source. I checked the temp on one of them and it was running at 104+ degrees F. The other one I just put my hand next to it and it was cookin too. After a little thought I had an idea. First I took some computer RAM heatsinks and used Arctic Alumina Thermal Adhesive and attached them to both transformers. I had some older Pentium processor 12v cooling fans with 1-5/8″ dia blades which turned out to be the perfect size. I attached one to each side of the rear cover and positioned them so each was pointed directly at a transformer. Wired them in parallel and made a switch box with a 12v power jack and hooked it all up. A 12v wall wart plugs into the switch box to complete the setup. These little fans move alot of air and they’re silent. So does it work? You bet your ass it does. The trannys are running at 95 F and the chassis stays cool enough to touch it. That’s a hell of a reduction. It creates a flow that runs across the heat sinks, then exhausts out the unused 1/4″ jacks on the back side. The way the fans are situated some of the air deflects off the transformers and flows around the tubes to cool them down a bit as well. All in all the design just freakin’ works, on this amp at least. The only thing I’m still unsure of is just how hot are these transformers supposed to get normally. and am I just treating a symptom of a bigger problem. I’m still looking for that answer and I know it’s out there somewhere.
How hot do your transformers get? Leave an answer in the comments below. Click here to find out what these are made of!
UPDATE#2: Be sure to check out the final and definitive update to this post here.

Laney Cub Tube Amp Made With Cardboard
Looks like the GAS still has it’s hooks in me because I’ve been eyeballin the Laney Cub 12R tube amp for a while now. Judging from the demo clips on line it’s pretty versatile with great tone and it’s a combo which is something I haven’t had in a while now because I’m a head and cab guy in general. But a combo was in my future (if one came along at a good price). Thanks once again to Craigslist one did. Quality was not an issue mainly because I didn’t see any reviews with any mention of quality as an issue, plus it’s a Laney, and the name has a top level reputation so I never thought that it might be shit quality, but I was soon to learn a name does not always equal quality. I realize it’s a Chinese made budget model but I STILL expected more from something Laney put their name on.
 After a week of playing I decided I didn’t like the brown Tolex, the tan colored weaved grill cloth or the angled opening. So I gathered up some snakeskin Tolex from Antique Electronics, some black grill cloth, a heat gun, contact cement etc. and proceeded to strip it down.
Up to this point I was very pleased with the performance of the little combo so that wasn’t an issue but alarm bells went off when I realized the corners were plastic, and the worst was yet to come. I was shocked to find out what the cabinet was actually made of because it ain’t wood. That’s right, no wood to be found anywhere on a Laney Cub 12R. You probably think “must be particle board” right? Wrong. In fact particle board would have been better.

Fucking cardboard!
This is made of some type of compressed cardboard similar to Masonite. 1/8″ thick on the face and 9/16″ everywhere else. It made me sick to see that a company like Laney would even think about using this crap. In fact I’ve never seen an amp or cab made of this shit material. WTF Laney?
I did the only thing I could think of which was to finish recovering it and put it back together. At least I wouldn’t have to look at that crap. It looks not too bad with the snake Tolex, black grill cloth, steel corners, and a vintage Eminence speaker (which sounds much better than the HH that came with it)* but every time I look at it I still see cardboard. Un-fucking-believable. But I gotta say it sounds great! So at this time I’m planning on building a solid wood replacement. I’ll document the build and post it when it’s all finished. As it sits right now It’s still a keeper based on the tone and versatility alone. A solid wood cabinet will make it even more desirable. We’ll see.
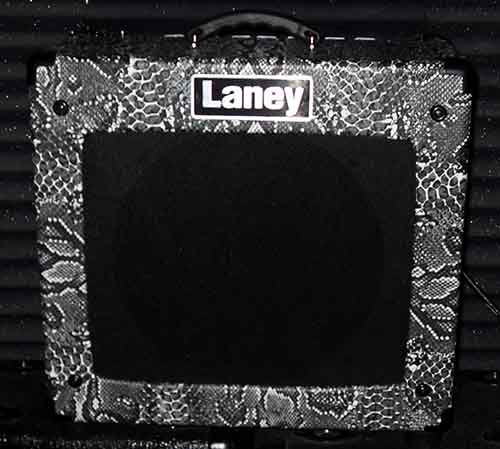
AT least it LOOKS better.
What’s your experience with what’s hiding under the Tolex? Leave an answer in the comments below. Click here for details on the Cub 12R hot transformer issue (and a solution)
Update on the speaker change (Celestion V-Type)

GAS Gear Acquisition Syndrome
Just When You Think it’s Safe to Go Back In the Guitar Shop.
 I have it, you have it, and a million other guitar players have it. GAS or “gear acquisition syndrome”. It creeps into your life without warning and sinks its hooks into your flesh and makes you a slave to it. You think about it constantly like a junkie looking for a fix only worse. And we’re powerless to stop it. All the guitars, pedals, pickups, amps, tubes, tuners, cabinets, straps, cables and a million other gizmos and gadgets can’t fill the need. So we surrender to it because we’re weak. Of course this is all an exaggeration (mostly) but it’s not to far from the truth. I’ve been lost to it for a long time, and all I can say is “thank God for Craigslist”. Without it I’d still have everything I’ve bought and would not have been able to sell a lot of it. Of course I always put the money back into more gear (I told you it was a sickness). But dammit I love it!
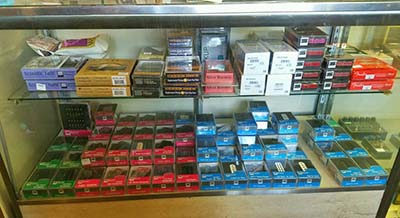
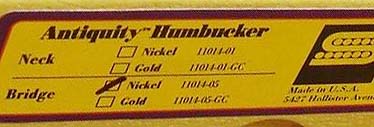 A while back I bought an EarthQuaker Devices Crimson Drive and it actually satisfied my search for the perfect overdrive pedal. It was amazing! I no longer had an unyielding urge to look for new gear. I thought “I’m FREE!” I was just playing and enjoying it more than ever. I felt it was safe to go into a guitar shop for strings and things without being in danger of seeing something that I couldn’t live without. So one day I headed out for strings and a couple of volume pots (legitimate need for those). Walked into the shop and while the guy was getting the pots I was looking around and in a glass case I spot a Seymour Duncan Antiquities Humbucker. I had, at one time, been in the market for one of these but opted for a Gibson 57 Classic+ because the Antiquity was nowhere to be found locally and I hate waiting for deliveries. But now I felt my pulse jump up a few beats then told myself “it’s probably for the neck position anyway”. That’s when I made a fatal error in judgement: I bent down for a closer look at the label on the box and there it was. A check mark next to “Bridge – Nickel”. At this point the guy was there with my pots and he asked if I needed anything else. Without missing a beat I said “yes, I’ll take that Antiquity Humbucker”. So much for being safe. You can tell a true GAS victim when they don’t even ask “how much is it?”
The thing is I do not regret it. Hell, I don’t regret ANYTHING I’ve ever bought or traded for or whatever. What’s important is the fact that I GOT it! And it sounds awesome. Oh yeah, I also bought some new power tubes that I didn’t need at all but they were just sitting there begging to go home with me.

Is there something to take away from all of this? Yes, I have now quit trying to quit GAS. The irony is that it’s now safer than ever to go into a guitar shop because I’m walking in with the intention of finding something to satisfy my GAS which means finding that “something” made the trip a success. And you can’t feel bad about that, right?
*note: I always shied away from ordering online because as I said, I hate to wait. That has now changed since I discovered Amazon has lots of stuff with free next day shipping. Occasionally “same day” shipping. So they’ve seen a lot of orders from me in the last 6 months. Just wait till they start their “drone delivery” service with 15 to 30 minute delivery times. Holy Shit I see an Antiquity for the neck position in my future!
How’s your GAS? Tell us about it in the comments below.

Bias Adjust Non-Locking Pot Made Secure
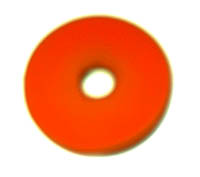
I used orange so it would show up better in the pics. They’re available in black
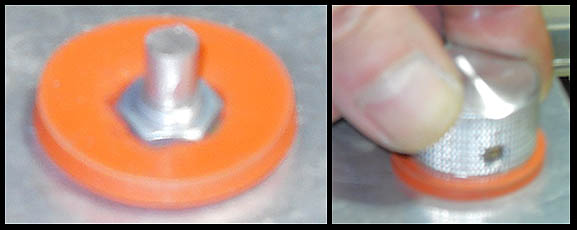
If you ever thought about installing an external bias adjustment pot but wanted to use a regular pot instead of a locking style I have the solution. This will let you use a standard linear taper pot that is secure and won’t move on incidental contact. In fact it takes a bit of force to move the bias adjust knob at all if you execute it right. Of course an external bias adjust will require either a bias right type of gizmo to connect your DMM or you will have to install external bias test points (which I won’t go into here). Once you have a test point you need to get the size of the trim pot being used for the bias adjustment and get a linear taper pot the same size. Mine was a 50K. A pot with a solid shaft works best. Next you need a knob that uses a set screw (the type you find on a stomp box is the perfect size). To make it more secure file a flat spot on the shaft for the set screw to lock onto. And finally the secret ingredient: a rubber washer that’s 1.125″ (1-1/8″) in diameter with a 0.1875″ (3/16″) hole in the center and is 0.125″ (1/8″) thick. A slightly larger center hole is ok because we’re going to enlarge it a little bit anyway. Once you determine the location of your adjuster drill the hole for the pot. On the rubber washer 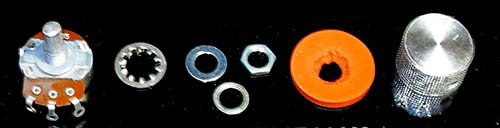 chamfer the hole in the center so the metal washer and the nut will set down into it and pinch part of it to the chassis. Then place the knob on the shaft and hold pressure down on it as you tighten the set screw. You want the knob to be pressed into the rubber. This creates a friction point and it will hold that knob in place. Incidental contact won’t move it, it takes a bit of force to make it move. Mines been this way for several months now and it works great. If I ever come up on a 50K locking pot I may switch it out. Maybe, depends on how much the locking pot costs. My way cost about 7 bucks if you had to go buy the washer, pot, and knob. But I’ll bet, like me, you’ve got some if not all of these parts already. If you know another method to accomplish this share it in the comments below.
Fix Sharp Frets
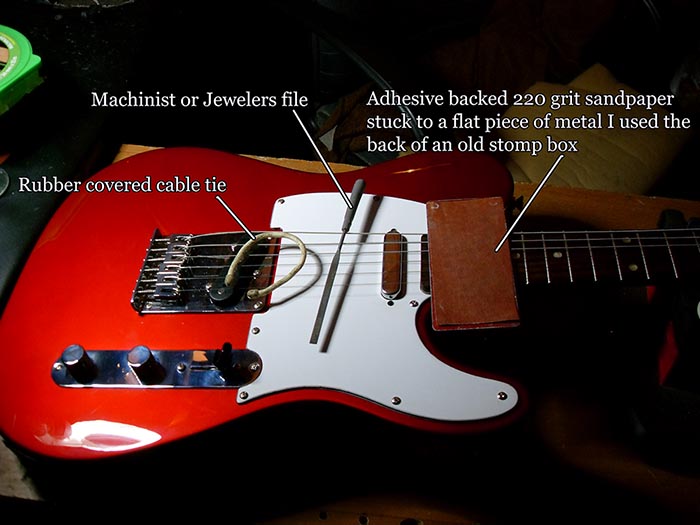
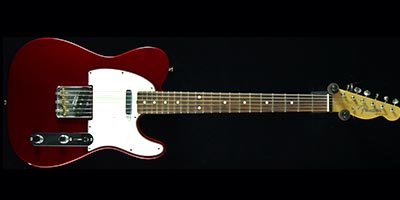
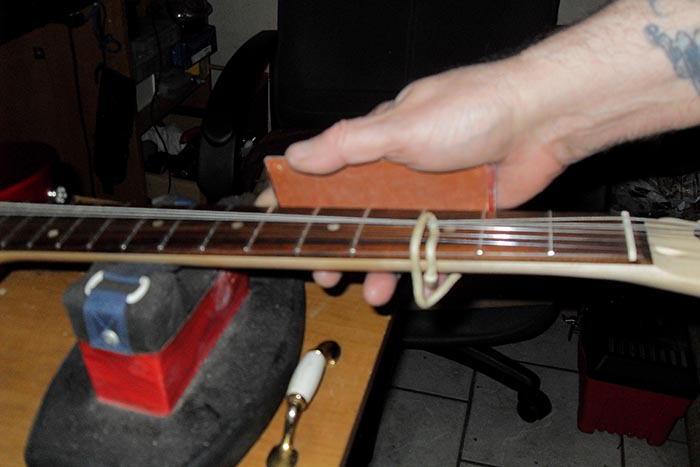
Sometimes a good deal comes with some not so great extras. Like the Telecaster I just got. It’s a Squier, but it’s a beauty. The Candy Apple Red finish is flawless, and the electronics are acceptable, but it had sharp frets poking out from the fretboard. They weren’t horrible but annoying enough that they had to be dressed down. Considering what I paid for it I figured I’d take a shot at fixing it. I mean, hell I’ve done just about everything else to a guitar but always avoided fret work so it’s high time I gave it a go. First, I watched half a dozen youtube videos on the subject then gathered up my tools and went to work. This turned out to be a relatively simple task although it was a bit tedious and time consuming. All you need is some masking tape, a jewelers file, some sandpaper and something rigid to back the sandpaper that allows it to span 5 or 6 frets at a time, and something to hold the strings out of the way unless you just remove them (which is the smart thing to do). I masked off the sides of the neck only leaving the fret ends exposed then
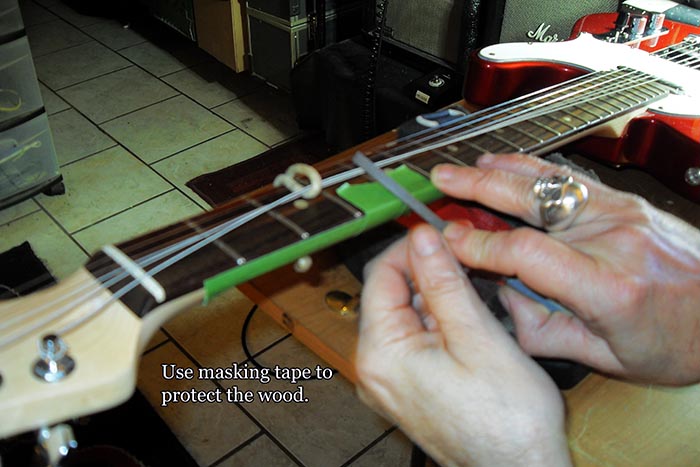
using a flat steel object (I used the back cover of an old stomp box) I dressed down the fret ends. Just hold the sandpaper at a slight angle that approximates the bevel of the frets and slowly go back and forth being careful not to alter the angle too much. You can hear it when you’re on the frets as opposed to the wood. Stop every few passes and check the ends with your fingers. Once you get that part smooth just place some tape on each side of a fret and using the jewelers file slowly round the rest of the fret end. Go slow and easy and check often so you don’t overdo it (it helps if you first grind and sand the edges of the file smooth so it doesn’t cut into the wood if you slip) If you can control the sandpaper and the file so as to maintain the proper angle you’ll be done in no time. And for the sake of your own sanity check out some of those videos on youtube before you dive in on this one.
Pull strings out of the way (removing them would be better but I’m kinda lazy)

New Design 1/4″ Output Jack
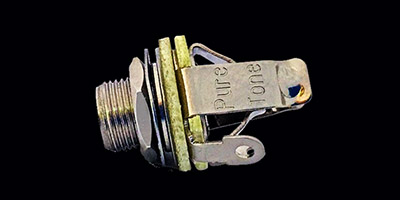
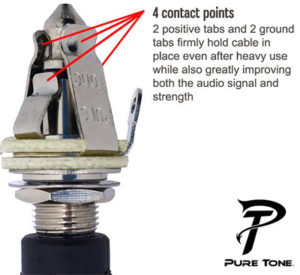 Finally, a fresh take on a tried and true, but old, design. The 1/4″ output jack. Until now the best available was from Switchcraft and the design hasn’t changed much for several decades. But there’s a new kid on the block that could potentially knock Switchcraft out of the top spot, and that company is PureTone. The product is called the “Multi-Contact 1/4″ Output Jack”. According to the literature their new audio jacks provide 100% greater surface area at all contact points which creates a more stable connection and this improves high and low frequencies for a more balanced sound and eliminates frequency spikes. It has dual tension grounds and dual positive tips which eliminate the notorious crackle sound. Whoever thought this up was a genius IMHO. As far as improving the tone I can’t say mainly because I don’t play clean so the differences would have to be pretty big for me to notice. Putting that aside for a moment the solid connection factor and the increase in contact area is definitely real and the design would certainly eliminate the crackle. The build is robust and the materials are top level which is obvious when you get your hands on one. The insulators are made out of a material I can’t identify, but they say the voltage rating is 500 volts so these would be great in an amp. They’re just solidly built and about as precision as anything I’ve seen. I ordered the 3 pack and I already installed them on all my guitars. I can really feel the difference when I plug in. It just feels solid and secure. It doesn’t make the guitar cable hard to unplug or anything it just feels right. Everything about this jack screams quality. You can get them from Amazon or direct from PureTone. I imagine they’ll start showing up in guitar stores before too long. Next time you need a replacement jack give em a try. These are going to give Switchcraft a run for their money. Good job PureTone.
If you try them and you detect a difference in tone or anything leave a comment below, I’d love to get your take on these.
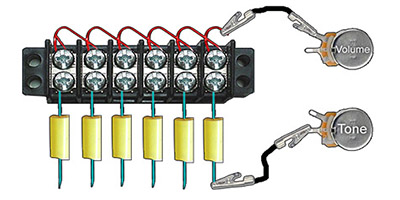
Tone Capacitor Comparison Test
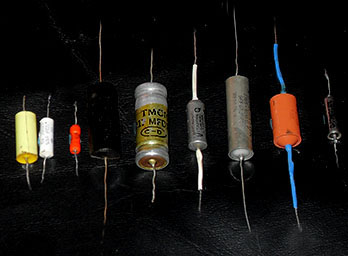 Trying to decide which capacitor to use for tone caps is not as easy as it really should be. I mean all the different types and values and it seems everyone has their favorite, and of course the tone is subjective to the listener

Harmony Guitar that Became a Martin
Harmony Guitar That Became A Martin
Guest Post by Calvin Jones
Originally appeared on the website https://calvinslifesong.com
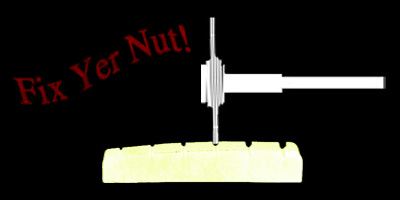
String Binding At Nut Sure Cure
 I recently noticed that I was getting a little string binding at the nut on my Hamer Studio. The nut on this guitar is supposed to be some kind of permanent self lubricating material so I got out the magnifying glass and had a look. I could see it wasn’t the smoothest surface inside the grooves, but I didn’t want to replace the nut.

Earthquaker Devices Crimson Drive Killer Overdrive
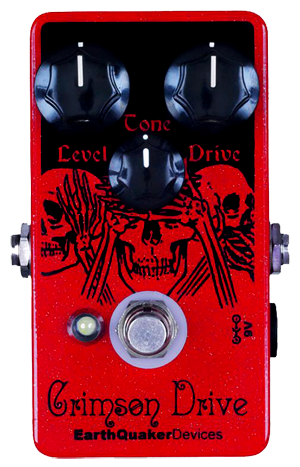 A while back I posted an article about a couple of overdrives I built and one of them was based on the Earthquaker Devices Crimson Drive which was one of my favorites.


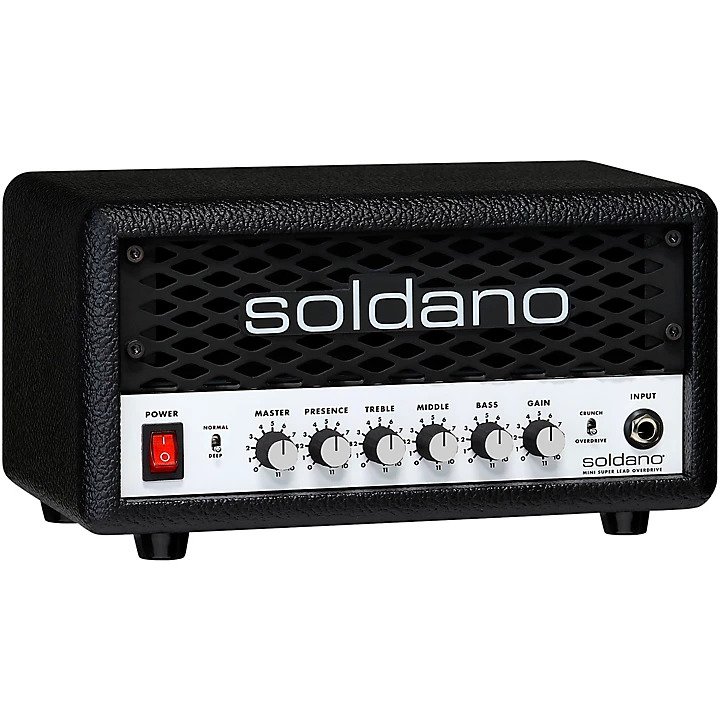 Soldano SLO Mini 30 Watt Killer AmpIn All Posts, Amps, ReviewsI have never gotten excited about ANY solid state amp. […]
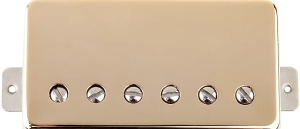 Leslie West Mountain of Tone PickupIn All Posts, Guitars, ReviewsWhen it comes to electric guitars, it’s common […]
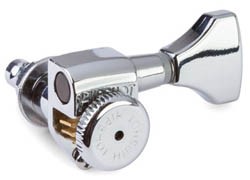 the BEST Guitar Tuners EverIn All Posts, DIY Mods, Repairs, ReviewsOver the past 20 yrs. it’s safe to say […]
 Dean Leslie West Signature ModelIn All Posts, Featured, Guitars, News, ReviewsLeslie West gained fame the world over during his […]
 Tributes to Leslie WestIn All Posts, Featured, NewsI’ve been playing guitar since […]