First Time DIY Modding Tips
So you want to get into diy modding your own gear
You’ve probably seen the forum conversations of dudes talking about modding their own gear or even building some themselves (like stomp boxes) and you think you’d like to get into some of that diy modding stuff too but don’t know how to get started. If you’re experienced in electronics then you don’t really need this article because you already know how to get going. But if you DON”T have knowledge or experience this post might help.
First, let’s define diy modding as it relates to music gear. It’s simple, Do-It-Yourself modifications to a piece of your gear. It applies to repairs as well. Another term you’ll hear a lot is “hot rodding”. It’s all basically the same thing: making modifications to your gear to change the behavior or function hopefully for the better.

Aoyue 469
Ok, before you jump in there are a few things to be aware of. First, you can learn to do these things as long as you can learn to use the tools properly. Soldering irons are the single most used tool in the diy modding world when it comes to music gear. You absolutely must be able to competently solder. If you need to learn there are a shitload of good websites that will help you and videos on youtube will give you a visual. You could teach yourself while doing some actual modding but you’ll end up with a bunch of stuff that doesn’t work because of cold solder joints, solder bridges, and of course burnt components. Save yourself the heartache and learn to solder first.

Vero board or strip board
If you know nothing about electronic circuits and components you can still mod or build by simply paying attention on the DIY sites and reading the comments because you will learn a ton of useful info there. And of course you can use google to find information. You should learn how to read capacitor and resistor codes etc. There are a bunch of places with PDF downloadable capacitor charts and resistor color charts so you should get one or two. And you don’t have to read a schematic because most of these pedal builds are laid out for Vero board (or stripboard). And the layouts show you everything you need to know.
Once that’s out of the way you need a first project, preferably one that you can afford to screw up. Because no matter how well prepared you are there is a good chance your first build will fail. But that’s ok because it’s all part of the learning process so I suggest a simple stomp box, one with not a million components. The EarthQuaker Devices Speaker Cranker is a great first build. (I’ll link to it at the end of the article) It has minimal components and the layout is easy to follow. I came up with a neat trick to help a first time modder avoid some of the more aggravating things that come with learning this stuff and there’s a link to the article at the end of this one.
On the other hand, you may decide to start with your guitar and maybe change or rewire the pickups or volume and tone pots or the switch, and this is a good place to start. but until you get really good with a soldering iron just make sure to cover the guitar around the area your working on so you don’t drop any hot solder on it. Hot solder goes right through the finish.
As far as your amp goes you should hold off on that until you get really good at soldering and you have taken the time to learn about working around high voltages because tube amps have it and it can kill you if you don’t know what you’re doing. I’ll leave a link to some good info on amps and how to safely work on them.
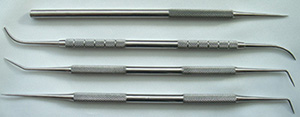
Dental Picks are worth their weight in gold
The last thing is tools. You’re going to need them. I recommend a decent solder station or at the very least a decent iron. I like a station because they have adjustable temps and usually a solder dispenser. A great first solder station is the The Aoyue 469 soldering Station. It’s a complete unit for about $35. Of course there are various hand tools also like small wire cutters, pliers, drill and drill bits, dental pick etc. I suggest you grab a couple sets of locking forceps. These things are a lifesaver when soldering in a tight space. Keeps you from burning your fingers with the iron. That really hurts.
So if you’re good with all that’s been said you should give it a go. It’s fun, it’s challenging and it will give you a real sense of accomplishment every time you plug in a newly built stomp box, crank up the guitar, slam a power chord and Holy Shit the freakin’ thing works! And that NEVER gets old.
Links:
Amplifier tech Aiken
Guitar FX Layouts Speaker Cranker Layout
Previous Article with tips for first timers
Soldering Stations Aoyue Weller
Download a capacitor chart Capacitor and resistor charts
Joyo Ultimate Drive Made Better
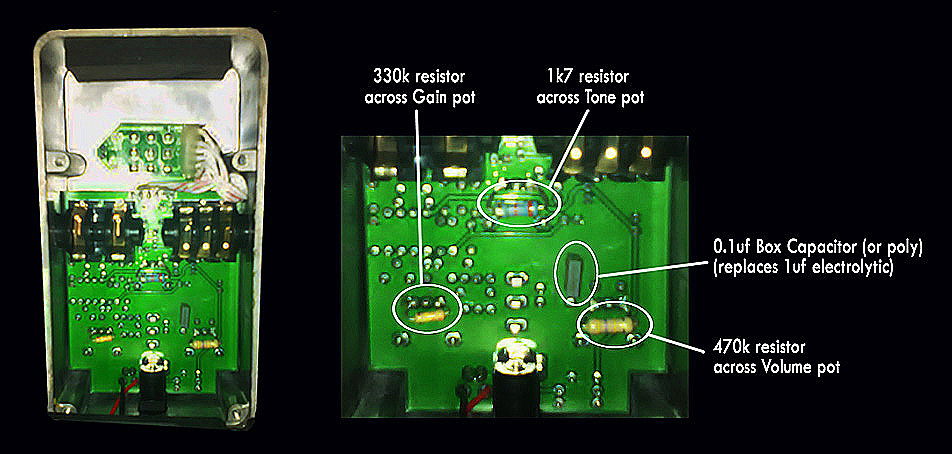
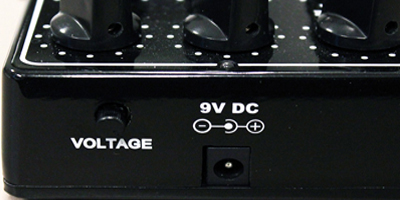
My craigslist $30 Joyo Ultimate Drive just got even better! It was a great sounding overdrive right out of the box for sure. It’s been compared to a Freakish Blues Alpha Drive, or more precisely they are the same drive with a few different component values. I found a mod that is supposed to make the Joyo sound more like the Alpha so I figured what the hell let’s give it a go. If you know the Alpha Drive then you know it cost right at $160 and the Joyo Ultimate runs approx. $40. The key difference is that the Joyo has more volume on tap with a fatter bottom end and the Alpha has a tighter bottom end and more chimey highs. They use the same PCB so the Alpha Drives appear to be re-branded Joyo’s. So with $1.50 worth of components I went in. This is about as simple a mod you’re likely to find so it’s a good first mod for a beginner. You have to pull the board out of the housing to get at the top to remove one component while the other 3 can be done from the back side. Here’s the mod.
1. Remove the 1uf electrolytic capacitor located at C9.
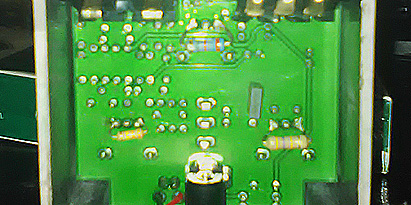
2. Flip the board over (see image below)
3. Insert a 0.1uf polyester cap in C9. I prefer box caps.
4. Solder a 330k resistor across Drive pot lugs 1 & 3.
5. Solder a 1k7 resistor across Tone pot lugs 1 & 3.
6. Solder a 470k resistor across Volume pot lugs 1 & 3.
Button it all back up and test drive it.
The difference is startling. It tightens up the bottom end and makes the tone knob much more responsive and adds a bit more in the high end. Before the change the Joyo was border line muddy but was controllable with the tone knob and backing off on the volume knob. With the mod it gives the tone and volume ability to go full on without losing any clarity. And it loses none of the pre-mod volume boost. So what I considered to be a great overdrive right out of the box is now a truly awesome dirt box. Now here comes the disclaimer: all results were achieved using humbuckers. I have no idea how single coils would perform so as always YMMV.
click for larger image
What’s the easiest mod you’ve ever done? Leave an answer in the comments below
One Overdrive Pedal Just Ain’t Enough
VHT V-Drive, Joyo Ultimate Drive, Way Huge Saucy Box
Sometimes it’s hard to find a deal on an item you may be looking for, and sometimes the deals hit one after the other. Such is the case here. I was looking for a good overdrive since I hadn’t tried anything new for awhile and was eyeballing a Way Huge Saucy Box. But I was hoping for a deal when I cam up on a VHT V-Drive at a killer price. Waiting on a response from the seller I found a Joyo Ultimate Drive for uber cheap and bought it. A few hours later I heard from the VHT guy and bought it too. Then I realized I had a gift card from Guitar Center that I hadn’t used so I said “screw it” and got the Saucy Box too. It turned out to be a good thing because these three overdrives are each pretty unique. Of the three I couldn’t pick one over the others.
The V-Drive is pretty versatile as it has volume, tone, drive, depth, texture, and the diode select knob with multiple clipping diode types in 10 different configurations and one bypass/clean boost setting. The depth knob brings in the lows and the texture knob works with the tone knob for a dizzying number of tone shaping options. It can go from clean to saturated and chimey to heavy grind and everything in between with a fair amount of volume boost too. Another unique feature is the voltage control. It goes from approx 5v up to approx 15v. Lower gets you kind of a loose sagging tone and the higher voltages tighten everything up and add headroom. Very useable
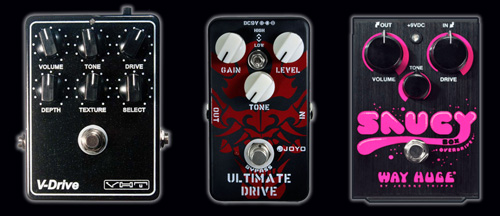
Next we have the Saucy Box. This one has just 3 knobs but it uses them in a different way. It reminds of a Voodoo Lab Sparkle Drive in the way it mixes the clean signal with the drive signal, but the two signals are hard set in a very pleasing way, so the tone knob does th mixing. Full counter clockwise it acts as a clean boost, and full clockwise your getting all the drive it can deliver (which is a lot). The magic happens between 10 and 2 where it’s giving you some of both circuits. And it’s a smooth overdrive even at the highest settings. It’s not as full sounding as the V-Drive but it’s a lot tighter in the bottom end and it puts out a slightly syrupy kind of tone which sounds great.
The Joyo Ultimate Drive was the biggest surprise out of all of them. This little dirt box sounds like a higher priced boutique overdrive. It has a lot of volume and drive on tap which can take you into distortion territory easily, and the tone knob has a huge affect through the entire sweep. Overall it’s a heavier tone than the other two pedals, but still smooth like the others. Highs are easily controlled too which is good but it will also pile them on if you want it to. All the controls seem to be interactive with each other but that may just be a perception on my part.
Keep in mind I was using my Hamer Studio with a 57 Classic + in the bridge position and a Burstbucker Pro in the neck position and these boxes seemed to play really nice with them. All in all it’s hard to pick a favorite because they’re all so different and useable for different things. So I’m going to pick….ALL OF THEM. Yep, I’d hate to have to decide to keep one and sell the others so to avoid anxiety and mental stress and confusion I’m gonna keep all 3. Much healthier that way. As always YMMV.

Stomp Box DIY For Beginners
So you want to build your own guitar FX pedals eh?
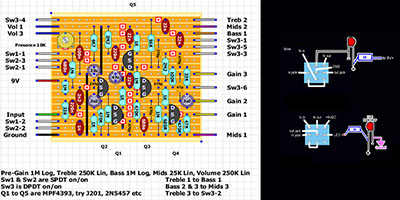
 If you’ve tried getting into the whole DIY thing you know how frustrating it can be for a newbie to figure how to do certain things especially if you want to build fx pedals (trust me I know). There’s tons of sites that are excellent resources for this and these guys know what the hell they’re talking about, and the forums and/or comments are packed full of information. But they are generally geared for those with knowledge of electronics and even experience doing their own mods. I started out with less then a cursory knowledge of electronics but I have now taught myself how to mod my own tube amps, mod pedals, and even build pedals from scratch. If I can do it so can you. Pick a starting project then research research research. And when you done researching it do it some more. I can’t stress this enough. The info is there, you just have to find it. What I’m putting out in this article is a method for beginners that will help with some of the more common issues faced when learning to do this shit. Here’s how it works: the usual starting point for any project is a schematic. As far as schematics go, far and away the best method to use is a vero board layout. These are much more than a schematic as far as I’m concerned. They’re readily available on the net and they really make placement of the components easier, but it has its quirks too. Like soldering all those tiny connections without creating tiny little solder bridges. Bottom line is it simply takes practice and experience. This variation will make it easier to get that experience. Keep in mind that this is in no way meant as a permanent method of using vero board, rather it’s a way to complete a few builds successfully, gain a bit of experience at soldering and start learning about circuits all at at the same time without much of the frustration and a box full of failed projects (I know all about that too).
(side note: You have to keep in mind that you are going to have failures. No way around that. Bugs are a fact of life for even the most experienced stomp box builder, and learning to diagnose bugs is part of the process. And you will use Google a lot. Research goes a long way remember? But this will help reduce at least some of the more common mistakes when you’re just starting out)
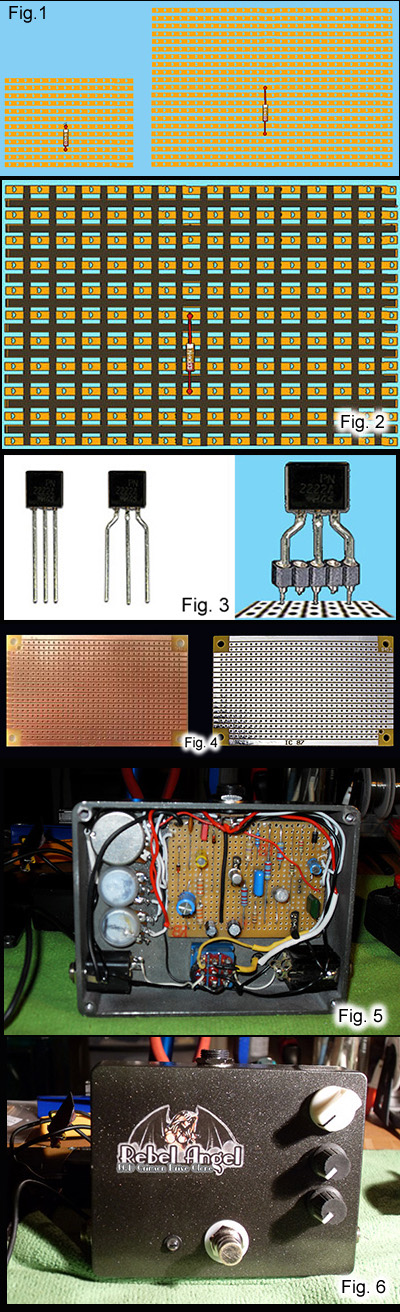
It’s simple really, You take a vero layout and expand it out to put an unused row and column between each valid row and column. Fig. 1 shows a component that’s actually in the exact same location on each board. It’s just that the second board is expanded. On my first attempt I kept losing track of the unused rows so I marked them out with a black Sharpie marker like Fig. 2.
The down side is you have to use the larger enclosure due to the larger board, but this is only meant to allow you to create a few successful builds and fine tune your soldering hand before you go for the smaller boards. Then you can start using the smaller enclosures. Another thing you will run into is mounting transistors and IC chips. For transistors the solution is simple: use sockets. In Fig.3 you can see how to bend the pins to make it work. If you need a 3 pin socket just make it a 5 and clip the pins off the ones not used. IC chips (op-amps etc) are another issue and I have a workaround for that as well. Here’s a link to it. IC_Chips .
As far as vero board goes there are two types (that I know of). One uses copper strips and the other uses silver (Fig. 4). I prefer the silver strips and I solder them with silver solder. There is no real technical reason for that it’s just that I like the boards with the silver strips and it just seemed logical to use silver solder. It seems to hold up quite well as it withstands the heat from the solder better than copper.
The solder I use is .022″ Dia. rosin core Silver Solder 62/36/2 because it has a slightly lower melting point than 60/40 and it snaps back fast. Just make sure you don’t move the component till the solder flashes or you could end up with a poor solder joint.
Fig.5 shows an expanded board in an enclosure. Fig. 6 is the front. This is an EQD Crimson Drive and it sounds incredible. And, yes, I had some bugs with it but it was just one missed cut on the second strip from the top. And it only took me a day and a half to figure it out. It’s the simple ones that really get you. But all is right with the world now. I also did an EQD Speaker Cranker that turned out great as well, but both will be redone with a standard vero board and placed into a small enclosure in the next few weeks. Then I can always reuse the larger enclosures for a build that requires it. No waste.
One last suggestion, when you’re looking for a layout for your first several builds, don’t pick one that has a gazillion components on the board. Pick one with as few comps as possible. If you want to find out what a particular design sounds like just youtube it, but keep in mind that your build won’t sound exactly like the demo. Hell they don’t sound the same even when you go buy a new pedal. But the videos can give you a general idea so at least you will know what territory you’re in.
So there is my contribution the the DIY world. If this helps even one person to get started then it was all worth it. Here are some links that you will find useful and indispensable. They contain the knowledge of the DIY universe. The first one on the list is a video channel with a bunch of great videos for everybody from beginners on up to seasoned builders.
https://www.youtube.com/user/chromespherecom
https://tagboardeffects.blogspot.com/
https://www.freestompboxes.org/
https://buildyourownclone.com/
https://www.generalguitargadgets.com/
Related articles
- Re: Soldering Stations Expensive but Handles are Cheap! (eevblog.com)

Electro Harmonix East River Drive Overdrive
All overdrives are not created equal
Sometimes the “hype” or just the brand name is enough to generate interest in a new product especially in the world of guitar effects. Such is the case with the Electro-Harmonix East River Drive Overdrive (advertised as a Tube Screamer clone more or less). The description sounded good, and the reviews, while limited, were pretty good, so I pulled the trigger on one ($58.99). Bad decision. I have never been so disappointed in a new stomp box and especially one from E-H. To be fair there was 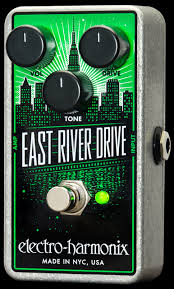 only one aspect of the thing that turned me off. Unfortunately it’s the first thing you notice when you kick it in gear even before the tonal characteristics. The volume drop. It’s pretty severe. I tried cranking it up and barely got past unity even at full volume. I’ve never had an overdrive that didn’t boost the volume with headroom to spare, although some had MORE on tap than others. The point is a drive with no volume boost is of no use to me. E-H has always put out a good product at an affordable price so maybe it was bound to happen that one would fall short of expectations, I don’t know (NOTE*: FWIW it’s also entirely possible that I got a defective unit). But don’t think that I’m writing E-H off. In fact they have another new release that I am going to take a run at later this week, it’s the new “Soul Food” overdrive. Early reviews compare it to a Klon. Stay tuned for a review on that one.


MXR Custom Badass Modified O.D. Pedal
MXR Custom Badass Modified O.D. WTF? Another Overdrive?
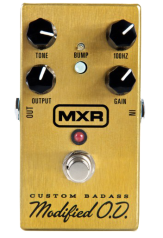
Ok, now that I’ve had the Badass Modified O.D. for a few days I can make a reasonable assesment on it. First thing is that it absolutely does what the mfgr. says it does. The range of tones is huge, thanks in part to the 100HZ knob and the “bump” switch. Note separation is good any settings and the tone knob is useful throughout its sweep (it doesn’t cut lows like some pedals). The only wrinkle is how it acts with other dirt pedals. It doesn’t sound too good with the Barber Burn Unit or the Akai Blues Overdrive at all. It likes the Open Road pretty well, but it LOVES the Voodoo Lab Sparkle Drive. With the MXR in front of the VLSD it sounds incredible. And I have to credit the VLSD “clean” knob for that. Here are the settings that I have found to worked for me. I am including them to give you a starting point. (YMMV):
Badass O.D.
Output: 11 o’clock
Tone: 3 o’clock
100HZ: 2 o’clock
Gain: 1 o’clock
Voodoo Lab SD
Gain: 3 o’clock
Tone: Cranked
Clean: 11 o’clock
Vol: 1 o’clock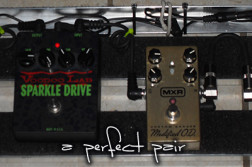
And just like everything else tone related, this is all subjective since what sounds sweet to my ears may be fingernails on a blackboard to someone else. But I can’t help but think that this would be a welcome additon to any pedalboard.


 A Video History of Dean GuitarsIn UncategorizedEPISODE 1 EPISODE 2 Read More […]
 Set Neck ReplacementIn Guitars, RepairsA friend asked if I could repair a broken headstock on […]
 Soldano SLO Mini 30 Watt Killer AmpIn All Posts, Amps, ReviewsI have never gotten excited about ANY solid state amp. […]
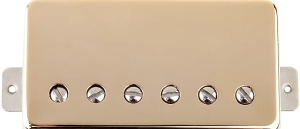 Leslie West Mountain of Tone PickupIn All Posts, Guitars, ReviewsWhen it comes to electric guitars, it’s common […]
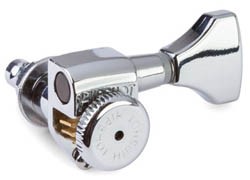 the BEST Guitar Tuners EverIn All Posts, DIY Mods, Repairs, ReviewsOver the past 20 yrs. it’s safe to say […]